- Messages
- 1,320
Activation Menu Structure/Design
Since this is an activation wheel of 4 options at a time, the actions to perform need to be broken down into overall groups (set as the Up arrow or 1 if using FDI):
At the top-level of each group, the options to Hide (10s) and Disable the use of the activation wheel (set as the Left and Right arrows or 2/3 if using FDI) are common to all of the overall groups (shown on the activation globe):
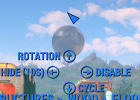
Once the overall group is selected we need to drill down (or Cycle) into specifics. For the Rotation and Movement groups these are:
Example for the rotation, hit the Up arrow to change the axis:
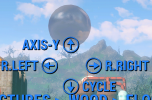
And the rotation amount, hit the Up arrow to change the amount:
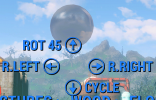
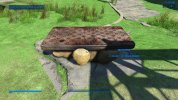
Similar is possible on the last created or grabbed object, though it is missing the Cycle option - this is for fine-grained control:

Having only 3 Cycle options makes it simple for the player. Other Options can be used to bring up a menu to show occasionally-useful but rarely-used options:


Since this is an activation wheel of 4 options at a time, the actions to perform need to be broken down into overall groups (set as the Up arrow or 1 if using FDI):
- Movement
- Rotation
- A "miscellaneous" group - Clone/Hide/Scale/Other
- Position/Angle (copy-paste)
At the top-level of each group, the options to Hide (10s) and Disable the use of the activation wheel (set as the Left and Right arrows or 2/3 if using FDI) are common to all of the overall groups (shown on the activation globe):

Once the overall group is selected we need to drill down (or Cycle) into specifics. For the Rotation and Movement groups these are:
- Axis (either of rotation or movement)
- Amount (0.1, 1 - default, 10, 45 - rotation or 100 movement)
- Apply the action on the chosen axis, for the chosen amount
Example for the rotation, hit the Up arrow to change the axis:

And the rotation amount, hit the Up arrow to change the amount:

Similar is possible on the last created or grabbed object, though it is missing the Cycle option - this is for fine-grained control:

Having only 3 Cycle options makes it simple for the player. Other Options can be used to bring up a menu to show occasionally-useful but rarely-used options:

